This guide will walk experienced C-BIG users through how to create an ad hoc report within Excel using Smart View.
Requirements
- Smart View installed on your computer. If you do not have Smart View installed, take a look at the Smart View Installation Guide.
- A C-BIG login and permissions to view data for your organization.
Connect to Smart View in Excel
- Click on the Smart View Ribbon.
- Click on Panel.
- In the Smart View panel, click on Shared Connections.
- Enter your User Name and Password and click Connect:
- Under Shared Connections, click on the dropdown that says "Select Server to proceed" and click EPM Cloud. Expand UCLA, then click on CBIGRptg. At the bottom of the screen select “Connect”, then select "Ad hoc analysis".
The Grid and POV
Once connected to Smart View and CBIGRptg:
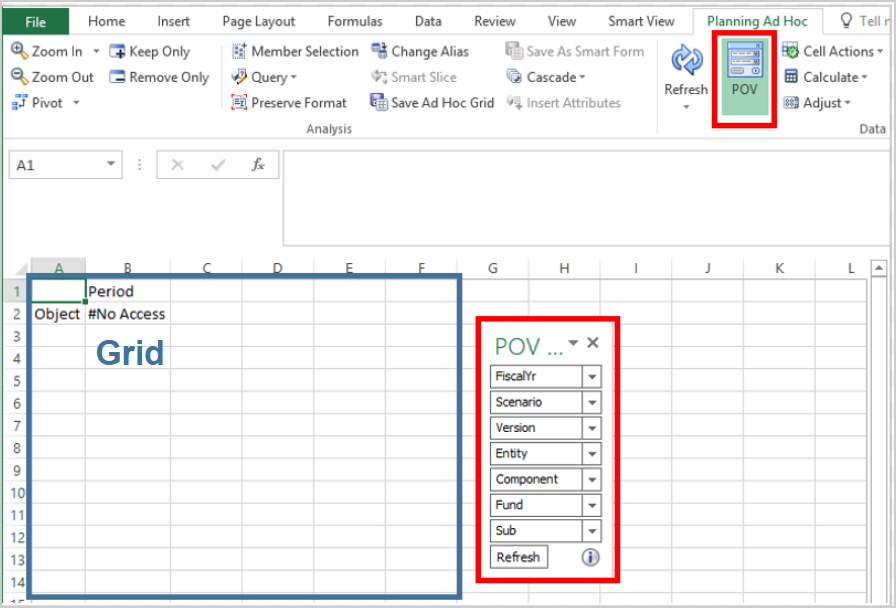
- By default, the Object Dimension will be in the row area (A2)
- By default, the Period Dimension will be in the column area (B1)
- All dimensions must be defined in either the Grid or in the POV.
- The Grid must contain at least one dimension in rows and at least one dimension in columns
- The POV is located in the POV menu box), and the members selected in these dimensions will apply to the entire grid.
- Only one member can be defined for each dimension in the POV.
Dimensions Overview
- All 9 dimensions must be present and defined within the grid or POV to retrieve data.
The dimensions available in the CBIGRptg cube are:
Entering Members and Dimensions in the Grid or POV
In order to get meaningful data from CBIG, we can change the dimensions and members shown on the grid.
The fastest way to select a member is to type the member into the cell. Once you are familiar with the hierarchy and names of the members, typing the Dimension name or member names into cells will simplify your ad hoc experience tremendously. Always hit Enter or click out of the cell after typing in a member/alias name and then click Refresh to view correct data for that intersection of members, otherwise an error will appear.
Set up Dimensions by typing
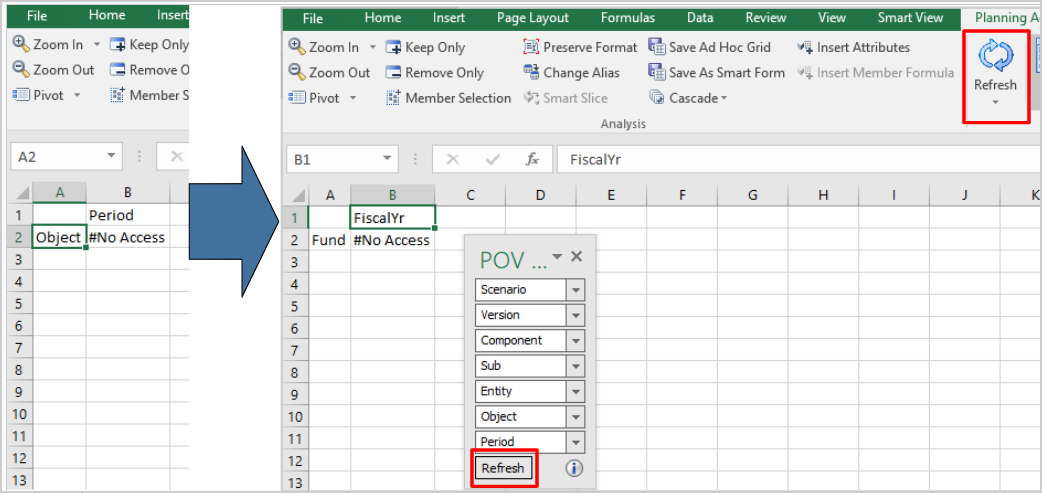
- Type in the dimension FiscalYr in the column cell of the grid (likely cell B2 where Period is filled in)
- Type in the dimension Fund in the row cell of the grid (likely cell A2 where Object is filled in)
- Click the refresh button on the Planning Ad Hoc tab, or in the POV menu.
- The Period and Object Dimensions will move to the POV, and FiscalYr and Fund will move to the grid once refreshed.
Selecting Members for each Dimension
Now that the layout of the ad hoc grid is set up, we'll select values for the dimensions in the Grid or in the POV.
There are several ways to select dimension members for the Rows, Columns, and POV:
- Type in the exact member name in the cell or POV field containing the dimension name
- Click on the dimension name and then click Member Selection to select from the dimension hierarchy
- Select members in the POV by using the POV tool
- Drill in and out of a dimension using the Zoom In button (or double click the cell) and Zoom Out button until you find the desired member(s) within a dimension. Use Keep Only and Remove Only to simplify your grid.
Exploring a Dimension using the Member Selection Box
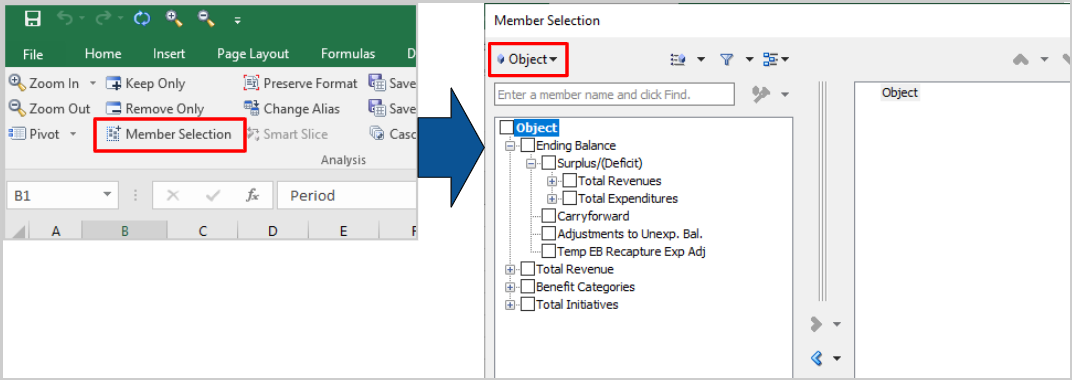
- Click on the dimension name and then click Member Selection to select from the dimension hierarchy.
- To change the dimension within the Member Selection Box, click on the dimension menu on the top left of the Member Selection box.
Complete the Member Selection Box
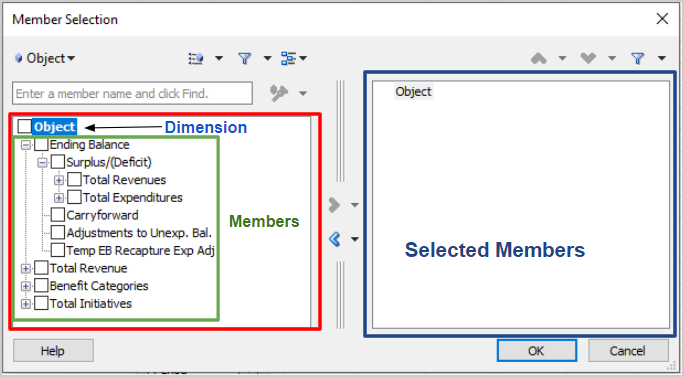
The Member Selection box has two panes with icons to move members in between the panes:
- The left pane contains the entire member tree for the dimension
- The right pane holds the members you have selected.These will populate in the spreadsheet when you click OK
- The arrows (► and ◄) in between the two panels are used to move members between the panes
Selecting Members
- Expand the tree and check the box(es) for member(s) you want to select in the left panel of the Member Selection dialog box
- Click the right pointing arrow ► to move members to the selection pane
- If there are members in the selection pane that you don’t want, select them and click the left pointing arrow ◄ to remove
- When you have the members you want in the selection pane, click OK
Ordering Members
The up and down pointing arrow (▲ and ▼) icons can be used to change the order of the members in the selection pane.
Set up Members for Dimensions in the POV Box
Members set up within the POV filters the data to the entire grid.
To select members for the dimensions in the POV menu, you can type in the member for each dimension, or you can use the Member Selection box:
- Click on the POV icon in the Planning Ad Hoc tab if it is not shown already:
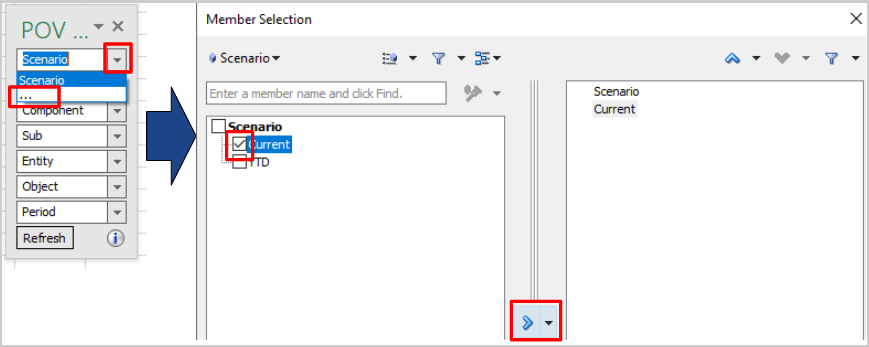
- Click on the ellipsis “…” in the drop-down to select a member from the dimension:
- The Member Selection window will appear.
- Select members in the Member Selection box by moving members to the right panel, then click OK.
- Select the member you selected from the drop down menu in the POV menu.
- Click Refresh in the POV menu to see the data with the newly selected member.
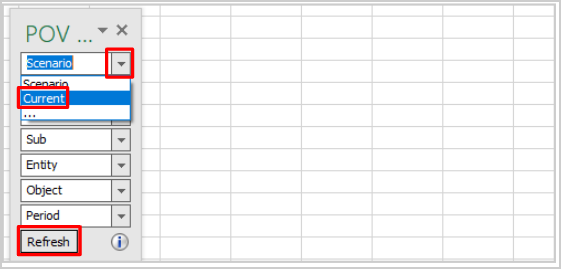
For this example, we'll want to set the dimensions to the following values in the POV:
- Scenario: Current
- Version: Working
- Component: Actual
- Sub: Total Sub
- Entity: Your Entity (Org, Division, sub division, department...)
- Period: YearTotal
- Object: Ending Balance
Zoom In & Out of Dimensions
- Zoom In: Allows you to drill down into lower members within the selected dimension hierarchy
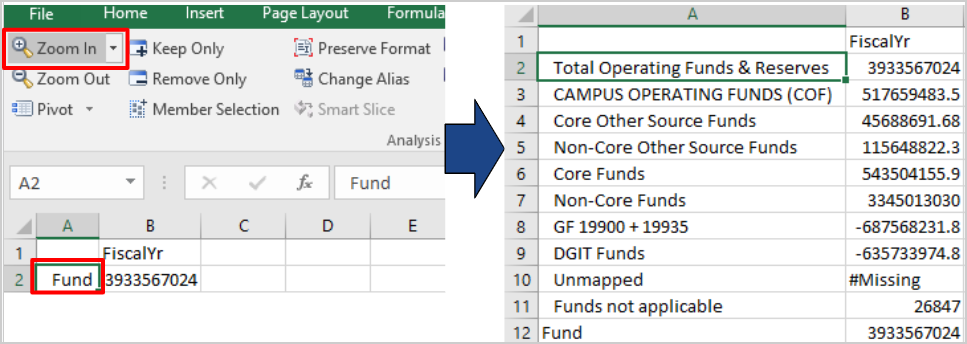
- Zoom Out: Allows you to drill up one level higher within the selected dimension hierarchy
Keep and Remove Members
- Keep Only - Allows you to keep only specified selected member(s)
- Remove Only - Allows you to remove only specified selected member(s)